….This guitar was not in a good way when it came in….
It’s nice to get something where you can make a big difference and really get your teeth into. This guitar was a long time old friend of a customer of mine. You know how you get attached to these things………
The first thing I had to do was work out if the thing could be made playable again.
There was quite a lot of damage on the headstock but I’m not going to worry about that – It did need a new tuning button though – easy enough….
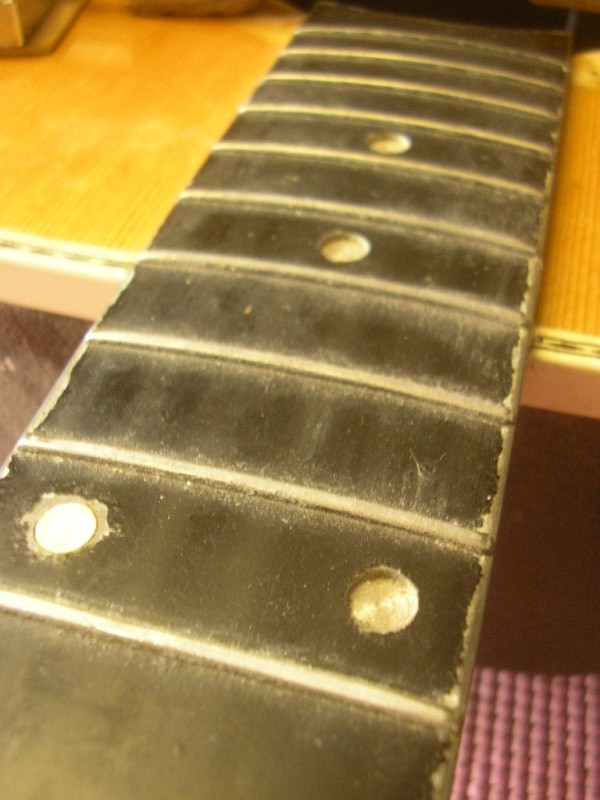
There was serious wear on the frets – some of them looked like the strings had been beaten into them with a shoe. I would normally have just ripped them out and put new ones in, but I was a bit unsure about the aluminium fretboard. So, I did some research and apparently, on these guitars the frets were never made to be replaced when worn. It can be done, but this entails filing the old frets right off and milling out the slots- masses of work (avoid). Ovations idea was to just unbolt the neck and put a new one on but that never really came to pass…… All I could hope was that the damage could be dressed out of the frets. This being the deciding factor I decided to do that first.
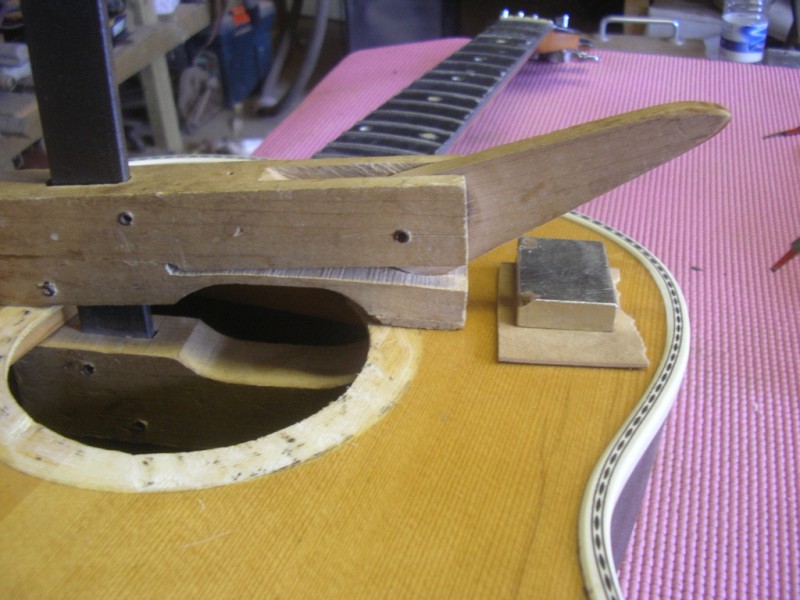
But, while setting up the jig for levelling the frets I noticed that the top was a bit springy(?!). Looking closer I could see that some of the braces had come away from the inside of the soundboard. This was easily fixed with PVA (white) wood glue and clamps. I take a good few minutes over this, applying the glue with a small brush while flexing the top, so that the glue penetrates fully into the gaps. Any excess glue in cleaned off with a damp rag before the clamps are applied. In places where clamps are difficult or don’t reach I use magnets. These are left over from when we built the wind turbine. Remind me to do a post on magnets someday….Love ’em! There were three loose braces that got fixed this way, one at a time, leaving enough time in between for the glue to dry. Then I left the guitar a few days for the glue to fully dry off.
After it had a rest, I gave it a fret dress. Using the string tension simulator I was able to get out most of the damage in the frets which was surprising considering how bad it was. Hopefully this should give the guitar good few more years enjoyment for the owner anyway.
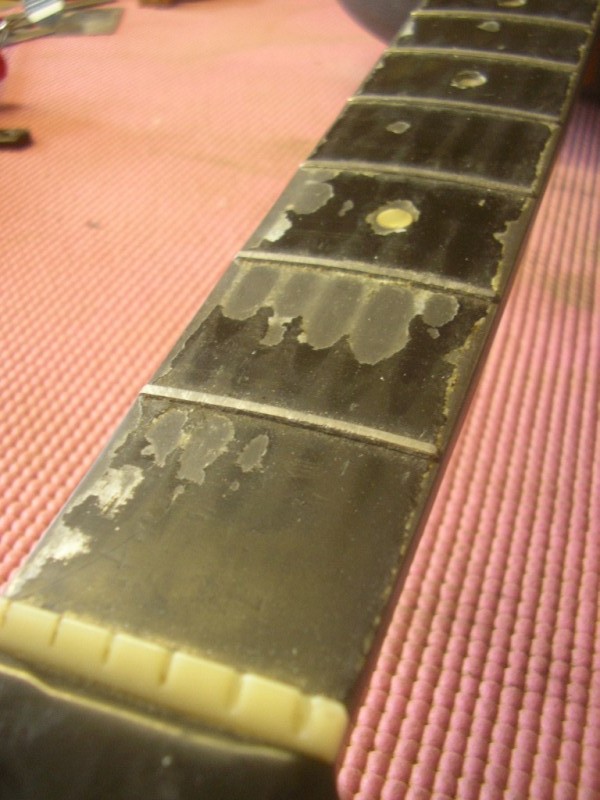
Now I was pretty sure it was gonna be alright, but the fretboard was still in a mess. I replaced the fret position markers with MOP including the (2!) remaining plastic dots.
My idea was just to remove the knackered paint and clean up the fret board, but when i did a tiny test to see what it looked like under the paint, it wasn’t good. The only solution was to leave it, or respray the fretboard.
We had enough black paint kicking about to do it, so in the back it went with Billy and came back looking brand new! We had a long dicussion about whether to mask off the frets and dots, but decided in the end it would be easier to just paint the whole board, then scrape the black finish off the MOP and the frets. This worked a treat..Again the guitar was left for several days for the paint to fully cure.
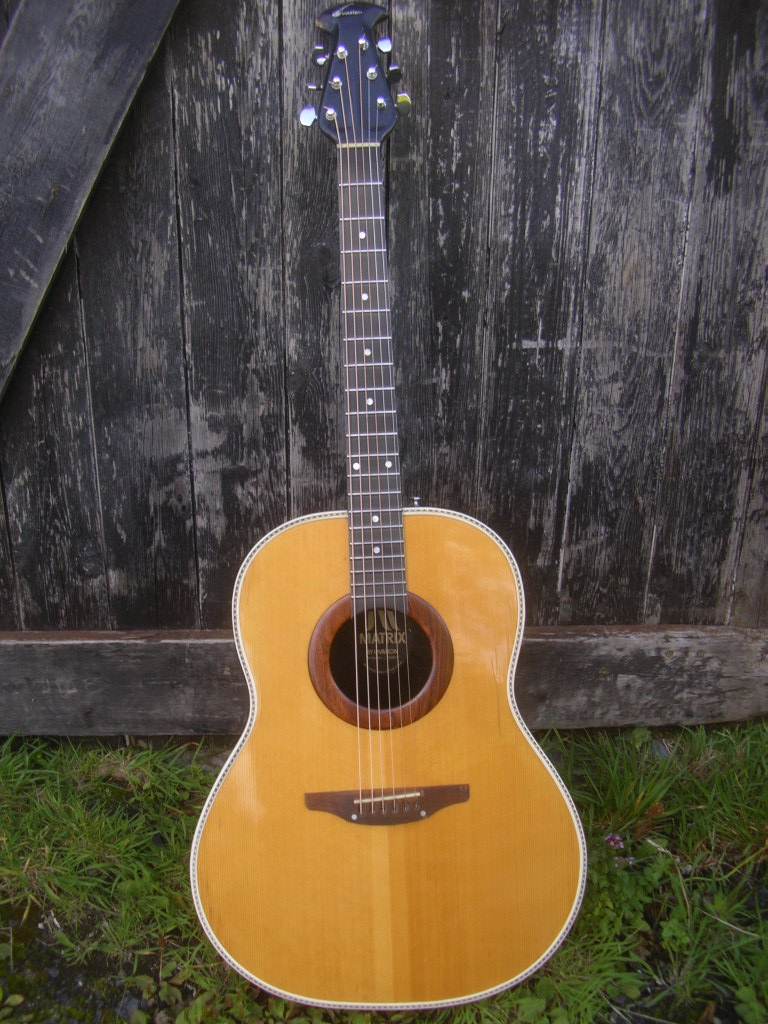
The rosette was 90per cent missing – what was left was just a mess of plastic. Ovation replacements were unobtainable, so I decided it needed a simple wooden rosette to cover it all up. I chose a nice piece of rosewood for this and layered it for strength with a black veneer underneath. Billy volunteered to finish it off and sprayed it with matt laquer.
While fixing the new rosette I noticed another loose brace and fixed that – I hope its not a sign that they are all about to drop off but at least the ones we fixed will stay put. If any more come off we’ll just have to glue them back on again.
So now the guitar is finished – a new lease of life for an old friend, and a happy customer – I hope………..I’m off to deliver it tonight at the Burrowfields! See you there…